

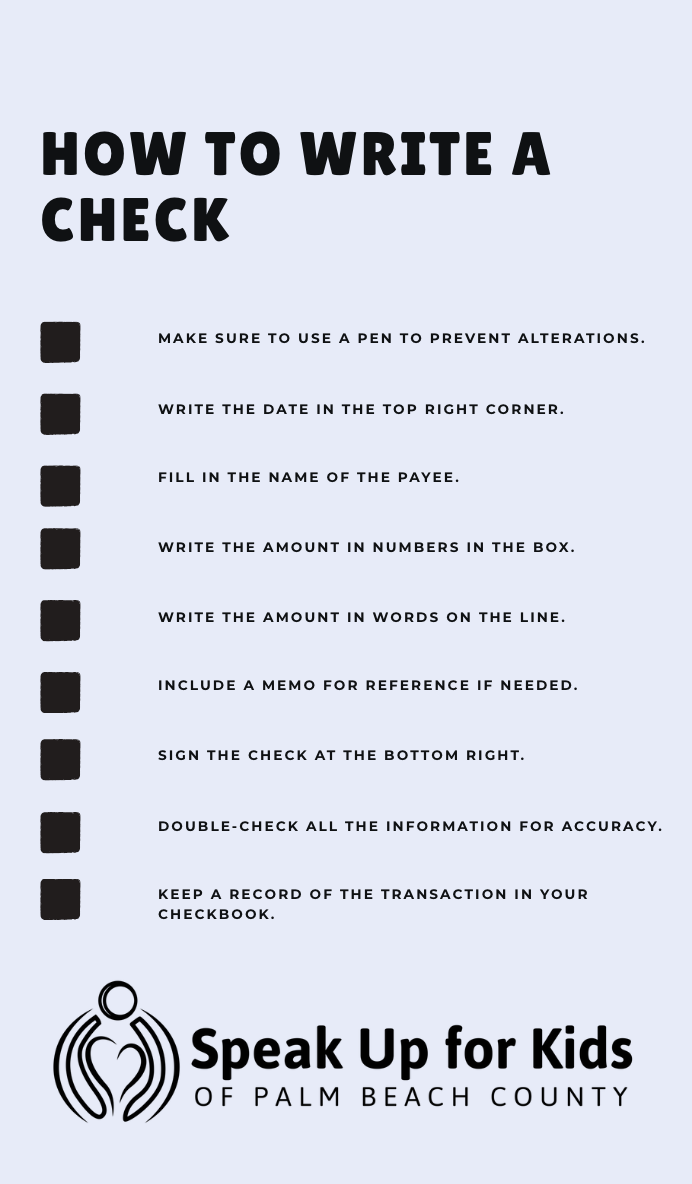
How to Write a Check
Contributed by Speak Up for Kids Student Intern Team — This article was developed through the combined efforts of multiple student interns, each bringing unique skills and perspectives to support life skills education for foster youth.
Overview
In today’s digital world, writing a check might feel like an old-fashioned skill—but it’s still an important one to have. Whether you’re paying rent, settling a bill, or sending a gift, knowing how to fill out a check correctly ensures your payment is processed smoothly and securely. Below we will go over the steps required to successfully write a check as well as important things to keep in mind while writing one.
Step 1: Date It
The date should be written at the top right corner of the check.
Make sure to always list the exact date that the check is being written, as the agency or person you’re making the check out to needs to know when you wrote it.
Don’t write a future date on a check. Banks aren’t required to wait until the listed date and may process the check as soon as they receive it. If you don’t have enough money when you make the check, you could face fees if the check bounces. A check bouncing refers to when the bank doesn’t honor or accept the check.
Step 2: Make the Check Out
Making a check out means addressing it to the agency or person you want to pay. You’ll write this on the line labeled “pay to the order of.”
It’s important to be specific when writing the name of who’s receiving your check, whether it’s a business or a person. Don’t use nicknames and make sure to double check that you have the name of the recipient correct.
Step 3: Numerical Payment
Write the amount of money to be paid numerically (for example, $521.03) in the small box located to the right of the “pay to the order of” line.
Make sure that you wrote the number legibly. If you didn’t you might end up accidentally paying more or less than you intended because of a typo!
Step 4: Written Payment
Below the “pay to the order of” line is where you write the amount of money to be paid in words to match the numerical amount you already listed. Write the words for the amount in the ones place and above, and then if the check also has numbers in the cents write that number as a fraction directly after it. For example, five-hundred twenty-one and then the fraction 03/100.
Writing the amount of money in words is important for banks to confirm that the numerical value is correct.
After you write the payment in words, if there’s still room left on the line, draw a line from after the fraction to the end of the line. This helps prevent people from tampering with the amount of money the check is for.
Step 5: Write a Memo
The Memo line in the bottom left of the check is for you to list why the check is being written.
You could put “school tuition” or “May rent” on the Memo line.
The Memo line is optional to fill out, but it’s useful for you to help keep track of your finances.
Step 6: Sign It
Now all that’s left is for you to write your name in the bottom right corner of the check, which tells the bank that you agree to pay the amount you listed above.
Make sure to use the same signature you used when you opened the checking account to avoid any complications and so that your bank has an easier time authorizing the payment.
Best Practices
There are several important things to keep in mind when it comes to checks:
Use permanent ink so that nobody can erase what you wrote and alter the information.
Write clearly so that others can easily read the information on your check.
Properly store or dispose of unused or old checks so that others can’t tamper with them. Secure them in a location known only to you if they’re unused and shred them if they’re old.
Double-check all of the information you wrote before you send the check off. Small errors and typos can cause the check to not go through, so make sure to be accurate.
Final Thoughts
The six steps to writing a check are:
Date the check
Fill in the “pay to the order of” line
Write the numerical value of the check
Write the words that correspond to the numerical value under the “pay to the order of” line
Fill in the Memo line
Write your signature
Remember to use permanent ink and properly secure or dispose of unused or old checks so that others can’t alter the information. Write clearly and double-check all of the information to make sure that the check goes through smoothly.
While most transactions today happen online, the ability to write a check remains a valuable skill. By following the correct steps and practicing good security habits, you can ensure your payments are clear, accurate, and protected. Whether you use checks often or only occasionally, knowing how to fill one out confidently keeps you prepared for any situation.